

What Time Is Pick 3 Drawing
Speed depict: Depict a figure in nether three minutes
Embarking on a speed draw is a bang-up way to warm upwards your creative muscles. Any life-drawing sessions begin with a few short poses, usually around three minutes or less. Even so, information technology'south useful to start every figure drawing in the ways shown in this workshop, regardless of how long the pose is. And there are many reasons for this.
Sketching quick poses provides a peachy warm-up for artists of all abilities, and volition often give you an idea of the best way to proceed with the longer drawing sessions. It also identifies whatever trouble areas that need to be worked on. Quick poses are great fun to practice and collect together for future reference – you'll exist amazed at how quickly your drawing improves.
Want more than cartoon content? Try our roundup of brilliant how to draw tutorials and make certain you've got the best pencils, likewise.
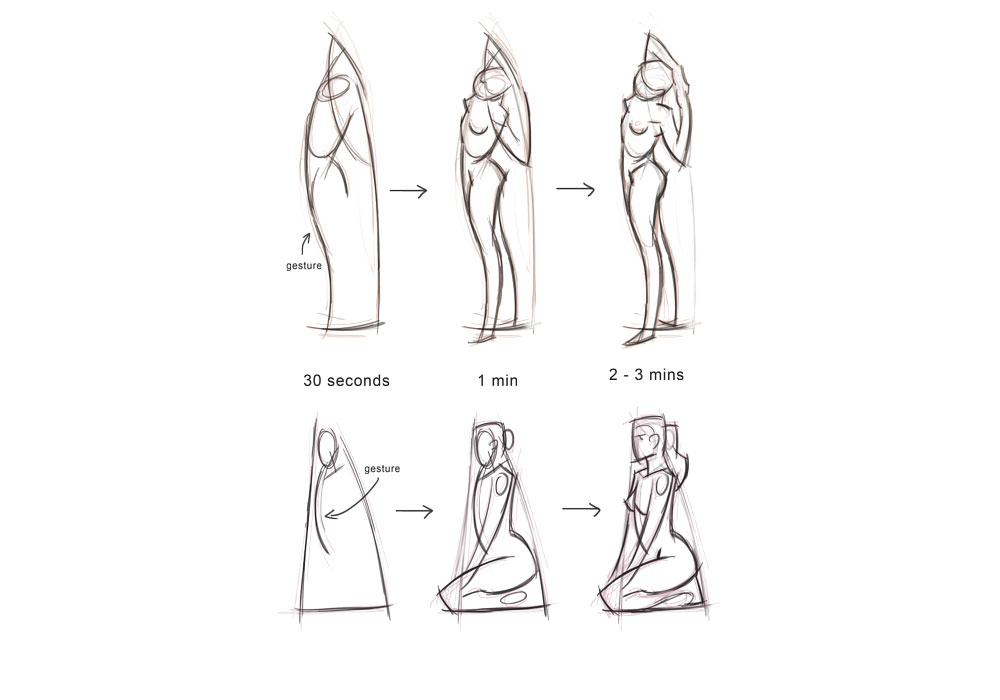
How to approach cartoon the body in 3 minutes
When drawing short poses, kicking things off with the torso, earlier adding the head, and follow the neckline down to the body. Next, ascertain the legs since they are usually the model'due south base. Whenever possible, draw both legs as a unmarried shape, then follow the outer profile starting at the hips, and movement down to the feet or toes.
Approach the arms the aforementioned way the legs, group them into one shape every bit much as possible. And then follow the gesture of the arm, starting at the shoulder and end at the hand or fingertips. This usually ends upward as a tapering rectangle with a simple shape for the hands. Here, we'll share some helpful tips for creating constructive sketches, merely remember, as with all drawing, practise is the thing.
01. Focus on gesture and shape starting time

(Epitome: © Chris Legaspi)
The commencement thing to focus on is gesture. The second is shape. Gesture gives movement, while shape provides the 'read' of what you're trying to draw. Both must work together to produce an constructive short-pose drawing and both are a great foundation for any drawing.
02. Go the trunk right
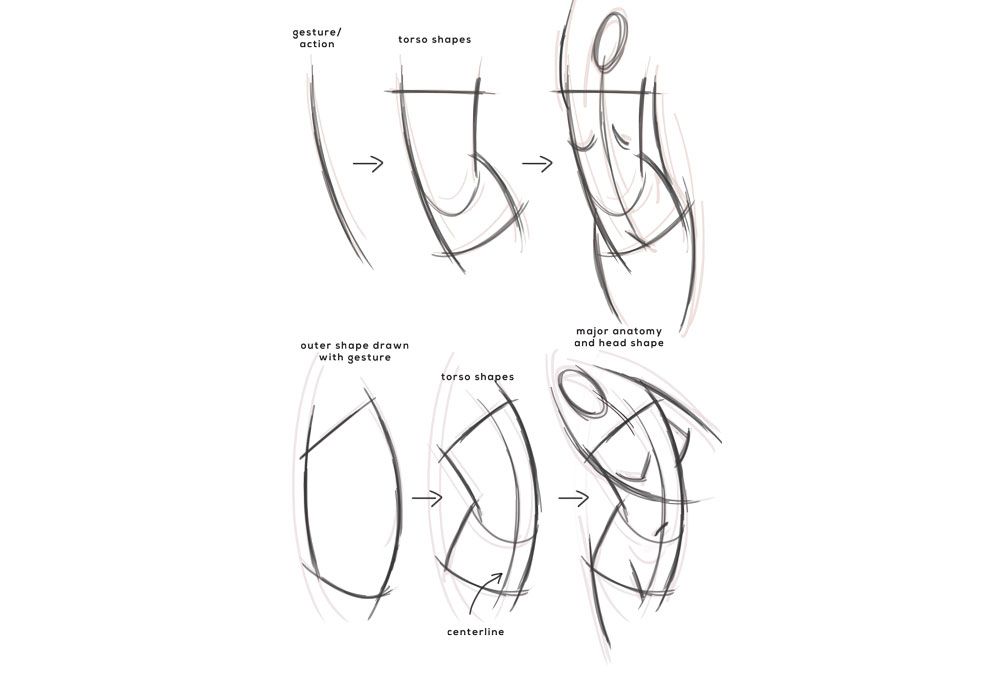
(Image: © Chris Legaspi)
Since the torso is the largest part of the trunk, try to draw information technology kickoff. Information technology'due south important to go this every bit correct equally you lot tin. Once the torso is working, yous tin add the head and the limbs to create the full figure.
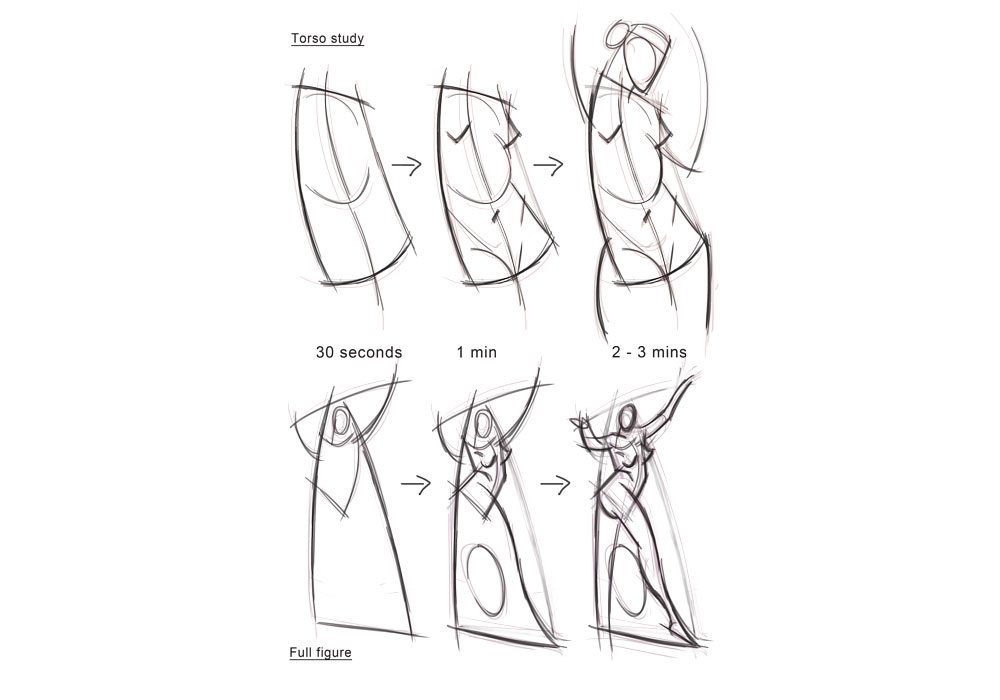
03. Piece of work pocket-sized

(Paradigm: © Chris Legaspi)
Next, draw quick modest sketches, around eight to ten cm in size. This forces you to focus on the overall action and 'read'. Fit as many every bit you lot can on one folio of your sketchbook or cartoon pad.
04. Remainder 'C' curves vs straights

(Image: © Chris Legaspi)
For every bend, try to put a directly mark at the opposite side of the effigy or form. This adds life to a quick sketch, only also makes the design of the drawing much more interesting.
05. Quickly sketch with lines

(Paradigm: © Chris Legaspi)
When sketching using a linear approach, try to brand every mark as long every bit possible. As always, start with the gesture, earlier continuing with the shape of the trunk. In the fourth dimension left, add limbs, indicate the caput and add in more anatomy.
06. Brand shapes
(Epitome: © Chris Legaspi)
When drawing with shapes, connect the outer points and major forms to create a big enveloping shape. Depict the 'envelope' slowly, making sure the proportions are working. So continue to add together limbs and details with the time y'all take remaining.
07. Consider tips for seated poses
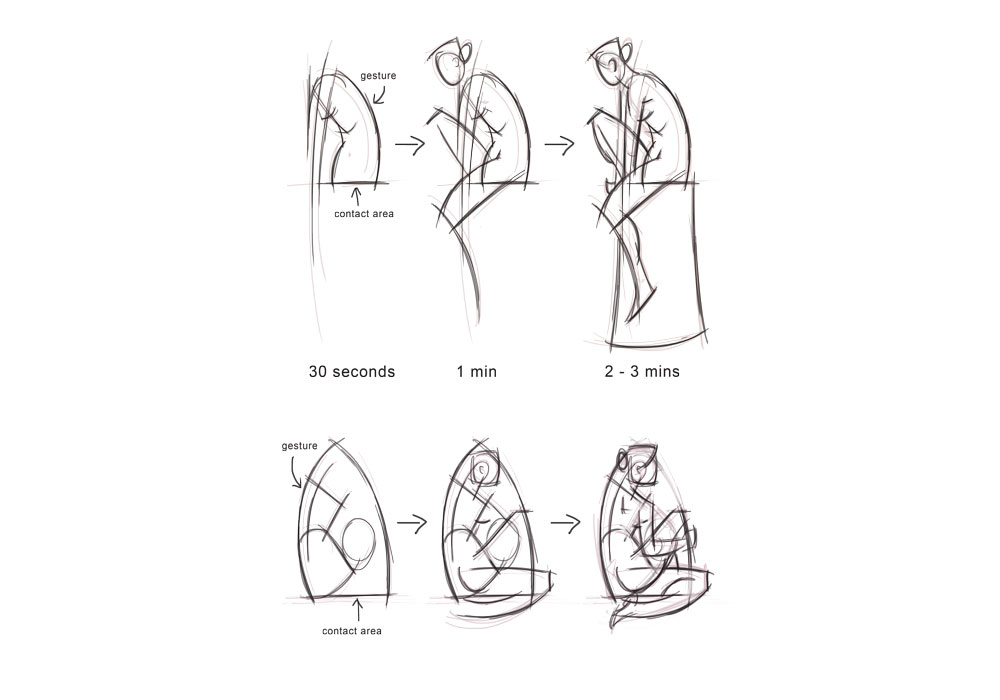
(Epitome: © Chris Legaspi)
For seated poses, emphasise the area where the figure contacts the surface. Use straight marks to create the illusion of weight and gravity, as this grounds the effigy. Once this contact is working, go on with your quick sketch.
08. Tips for reclining poses
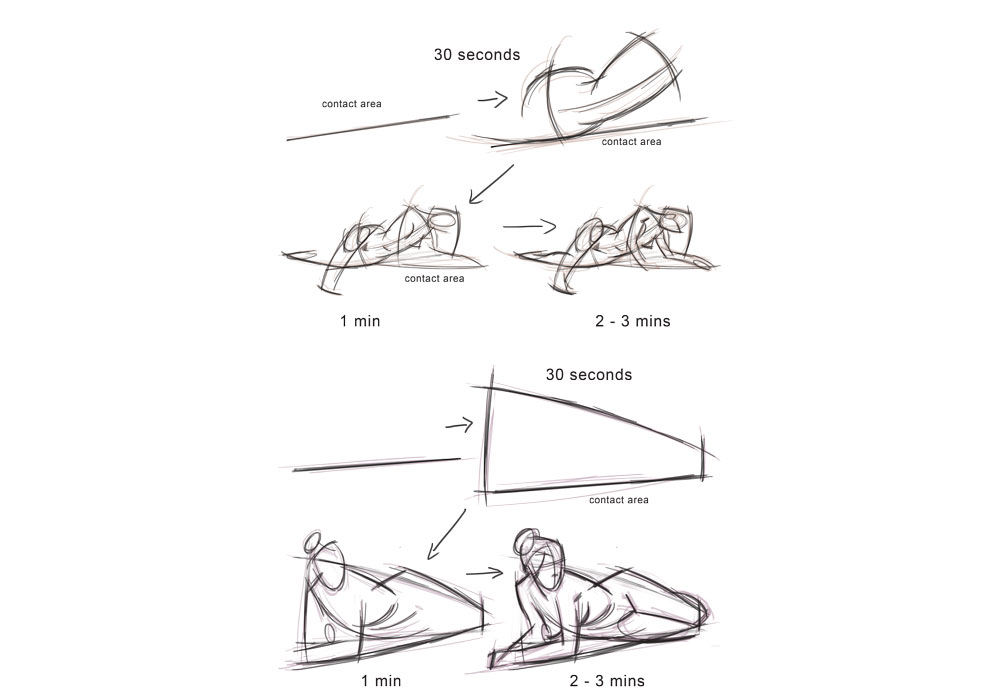
(Paradigm: © Chris Legaspi)
Like a seated pose, plant the contact area kickoff. If there are many contact points, kickoff with the office of the trunk and/or legs that make contact start. Equally yous draw, include other smaller areas that contact the surface.
09. Tips for side views
(Image: © Chris Legaspi)
Because there is less to draw in a side view, there's usually more fourth dimension to add detail. With these details, add and emphasise as many overlaps every bit possible. Make the overlaps darker to aid push the feeling of depth. Read the side by side tip for more on overlaps.
ten. Work on overlaps
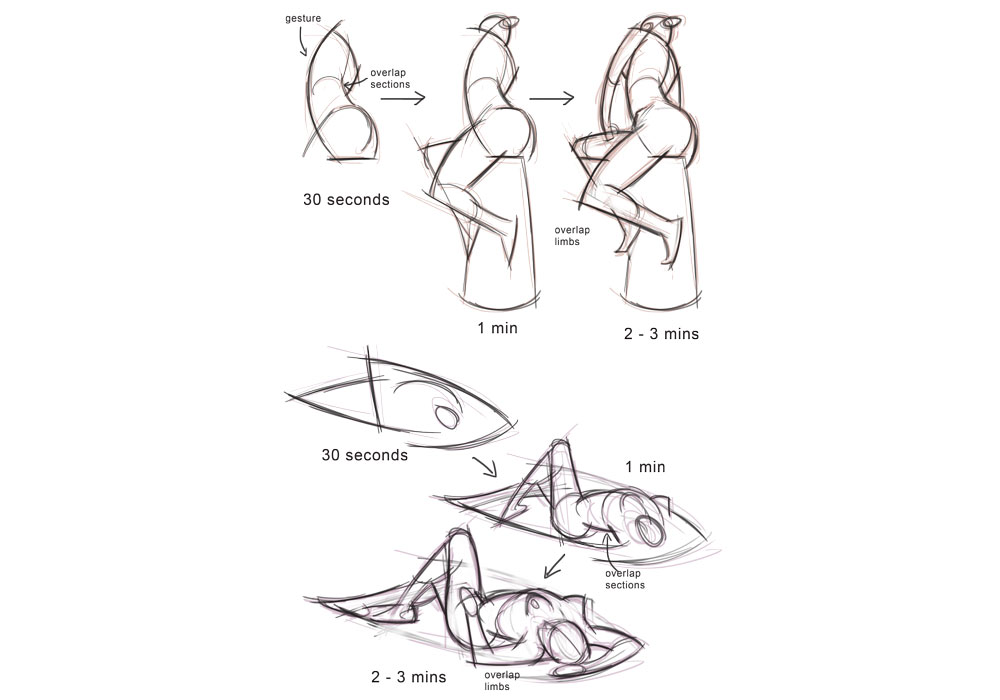
(Paradigm: © Chris Legaspi)
Overlaps are a smashing tool for foreshortened poses. For these poses, draw the torso as iii separate sections so I can emphasise overlaps. When the trunk is working, add the limbs, which you lot can and then utilize equally tools for more overlaps. The helps create a sense of depth and 3D space.
This content originally appeared in Paint & Draw: Anatomy. Yous tin can purchase the Anatomy bookazine hither . Or explore the rest of the Paint & Draw bookazines .
Read more:
- How to draw a torso
- The best sketchbooks to brand you a better artist
- How to draw a graphic symbol in pen and ink
Related articles

Source: https://www.creativebloq.com/how-to/speed-draw-figure
Posted by: wilkinsmusection.blogspot.com
0 Response to "What Time Is Pick 3 Drawing"
Post a Comment